Configure the Device Specific Settings
To configure the Device Specific Settings, do the following:
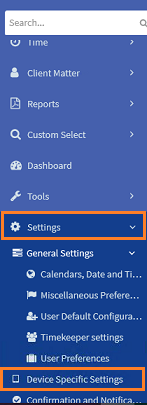
- From the Navigation menu select: Settings > Device Specific Settings.
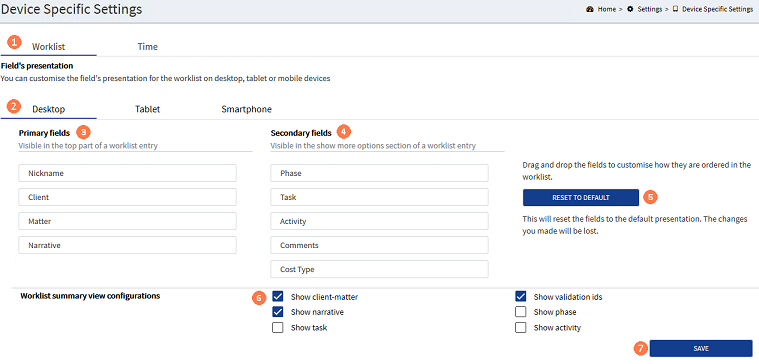
- The tab will open and display the current users settings over 2 main tabs:
Each tab has 3 sub-tabs:
- Desktop
- Tablet
- Smartphone
All of the options can be edited. The default tab displayed in the Worklist > Desktop tabs.
 Worklist and Desktop
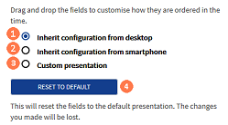
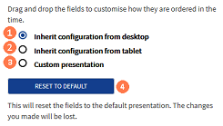
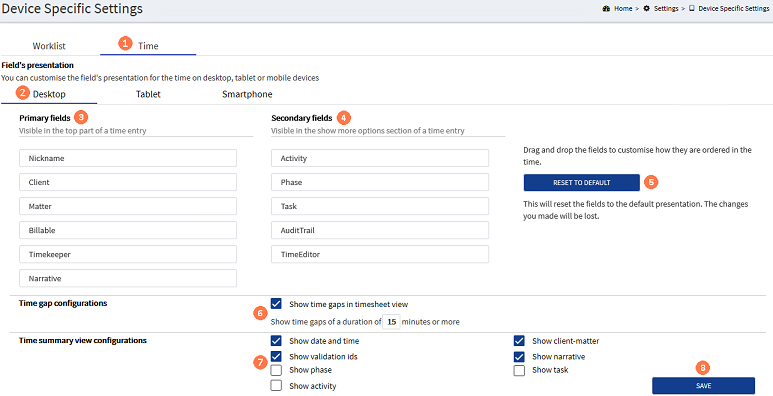
 Primary tab : This tab is selected by default. To change the Time options, click the Time tab to change the configuration in the Timesheets.
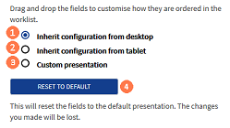
 Secondary tab - Device types : Click either the Tablet or Smartphone tab to edit the configurations applied to those device types.
 Primary fields : These are the fields that are displayed in the main section of the Add Worklist and Edit Worklist forms. Each field can be dragged and dropped to the Secondary fields list, where they should be displayed in the Show more options section of the Manage Worklist / Edit Worklist forms.
 Secondary fields : These are the fields that are displayed in the Show more options section of the Add Worklist and Edit Worklist forms. Each field can be dragged and dropped to the primary fields list, where they should be displayed in the Main section of the Manage Worklist / Edit Worklist forms.
  Reset to Defaults : The desktop primary and secondary fields are enabled by default and are considered the master fields. The system administrator can configure the defaults that should be displayed in the Primary options and the Show more options section of the Manage Worklist form and Edit Worklist forms. Where the user has dragged and dropped the fields to change the default configuration clicking this button will reset the fields back to the defaults.
 Worklist summary view configurations : When adding new Worklist items, the fields that are displayed in the summary are configured here. Only those fields where you have selected the check-boxes are displayed in the summary.
 SAVE button : Where the current configuration in any of the screens are edited, click the SAVE button to save the changes. The changes will be displayed in the Manage Worklist and Edit Worklist forms.
Worklist and Tablet or Smartphone
 SAVE button : Where the current configuration in any of the screens are edited, click the SAVE button to save the changes. The changes will be displayed in the Add time and Edit time forms.
Time and Tablet or Smartphone